
29
Jun
Load Cell Measurement using Arduino
Introduction
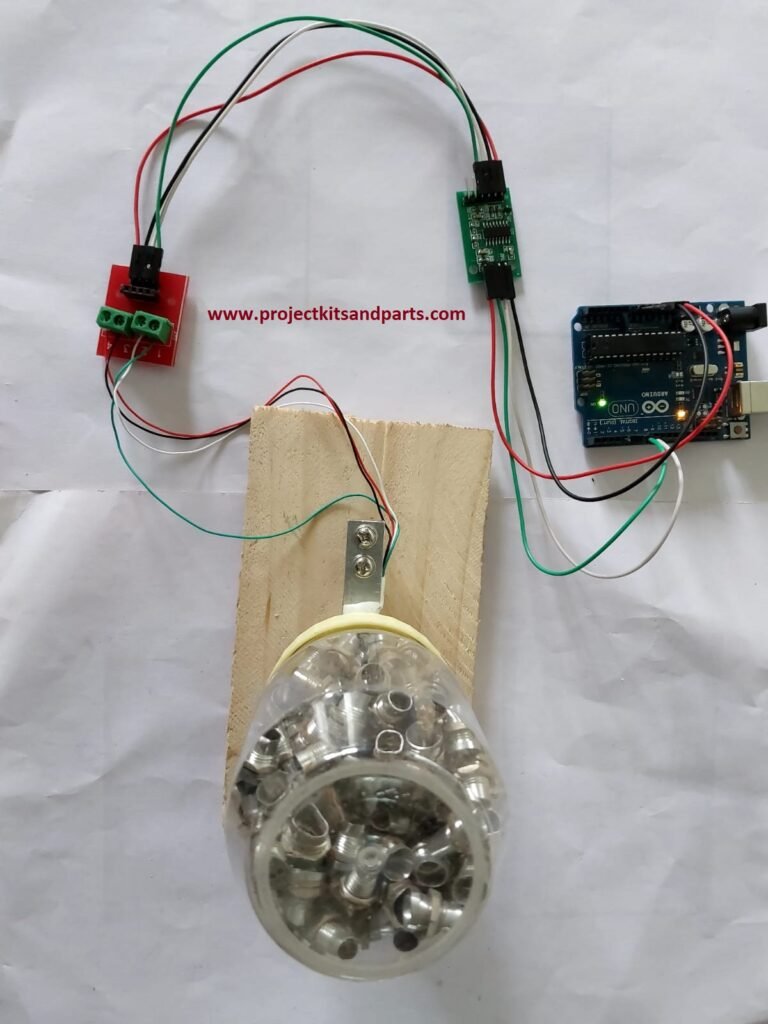
In this project, we will build a system to measure the weight or force applied to a load cell using an Arduino microcontroller. The load cell will convert the applied force into an electrical signal, which will be amplified and processed by the Arduino. We will display the measured weight on an LCD screen.
Materials
To complete this project, you will need the following components:
- Arduino Uno board
- HX711 load cell amplifier module
- Load cell
- jumper wires
- LCD screen (16×2 or similar)
- Power supply (USB cable or external power source)
Circuit Connections
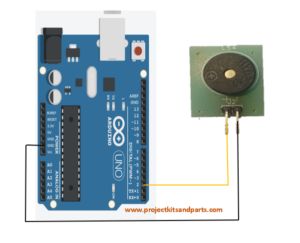
- Connect the load cell to the HX711 amplifier module. Typically, the load cell has four wires (red, black, white, and green) or three wires (red, black, and white). The red and black wires are for power supply (usually 5V and GND), the white wire is for signal output, and the green wire is optional for temperature compensation (if available). Refer to the datasheet or manufacturer’s documentation for the specific pinout.
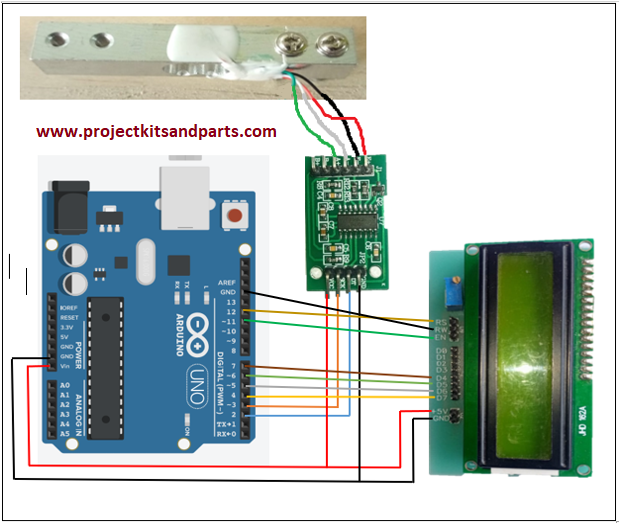
- Connect the HX711 module to the Arduino board as follows:
- VCC to Arduino 5V pin
- GND to Arduino GND pin
- DT to Arduino digital pin (e.g., pin 2)
- SCK to Arduino digital pin (e.g., pin 3)
- Connect the LCD screen to the Arduino board:
- VCC to Arduino 5V pin
- GND and RW to Arduino GND pin
- RS to Arduino analog pin A12
- EN to Arduino analog pin A11
- D7 to D4 Arduino analog pin A4 to A7
- Optionally, connect the LCD contrast adjustment pin to a potentiometer and then to the Arduino 5V and GND pins.
- Connect a 220-ohm resistor in series with the LCD backlight (if applicable) and connect the other terminal to Arduino 5V pin. Connect the other terminal of the backlight to GND.
Circuit Diagram
Arduino Code
Here’s an example Arduino code that reads the load cell data and displays the weight on the LCD screen:
#include “HX711.h”
#include <LiquidCrystal.h>
// with the arduino pin number it is connected to
const int rs = 12, en = 11, d4 = 5, d5 = 4, d6 = 3, d7 = 2;
LiquidCrystal lcd(rs, en, d4, d5, d6, d7);
// Define the pins connected to the HX711 module
const int LOADCELL_DOUT_PIN = 7;
const int LOADCELL_SCK_PIN = 6;
HX711 scale;
void setup() {
Serial.begin(9600);
scale.begin(LOADCELL_DOUT_PIN, LOADCELL_SCK_PIN);
lcd.begin(16, 2);
lcd.setCursor(0, 0);
// print the number of seconds since reset:
lcd.print(“Welcome to “);
lcd.setCursor(1, 1);
lcd.print(“Dolphin Labs” );
// Adjust the calibration factor for your load cell
scale.set_scale(1.0);
scale.tare();
}
void loop() {
if (scale.is_ready()) {
long reading = scale.get_units();
//Serial.print(reading);
long weight= reading/203;
Serial.print(“Weight: “);
Serial.print(weight);
Serial.println(“gm”);
// set the cursor to column 0, line 1
lcd.clear();
lcd.setCursor(0, 0);
// print the number of seconds since reset:
lcd.print(“Weight: “);
lcd.setCursor(8, 0);
lcd.print(weight);
lcd.print(” gm”);
}
delay(1000);
}


