
01
Jul
DHT11 Sensor Interfacing with Arduino UNO
Introduction of DHT11:
The DHT11 is a low-cost temperature and humidity sensor that can be easily interfaced with an Arduino board. The DFRobot_DHT11 library provides functions and utilities to communicate with the DHT11 sensor and retrieve temperature and humidity readings.
The process of using the DHT11 sensor with an Arduino board, including the necessary hardware connections, code explanation, and usage instructions.
Components Required
- Arduino UNO
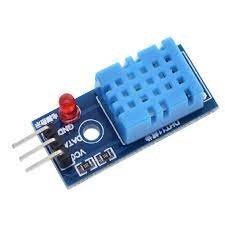
- DHT11 Temperature and Humidity Sensor
- Power supply
- Connecting wires
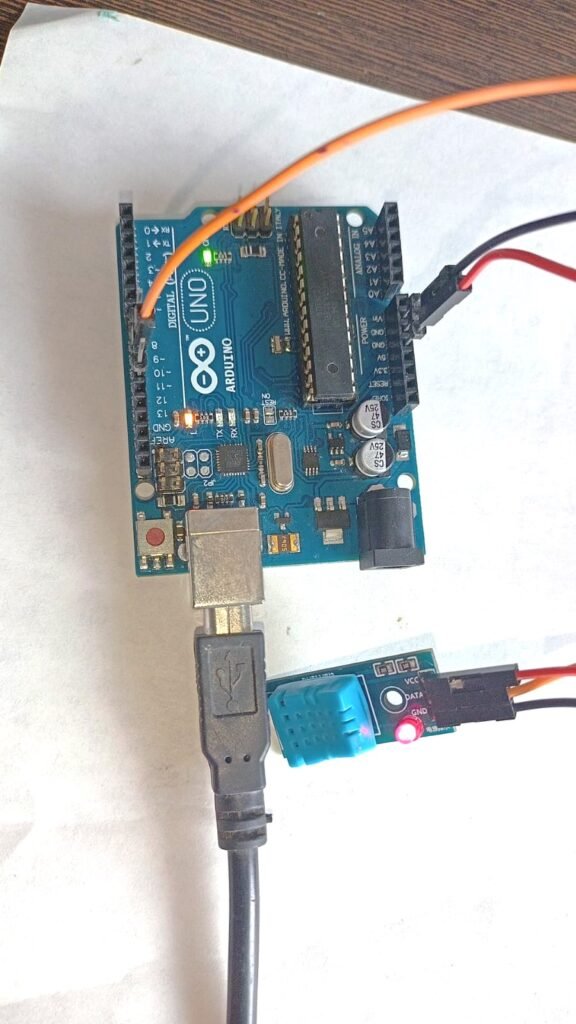
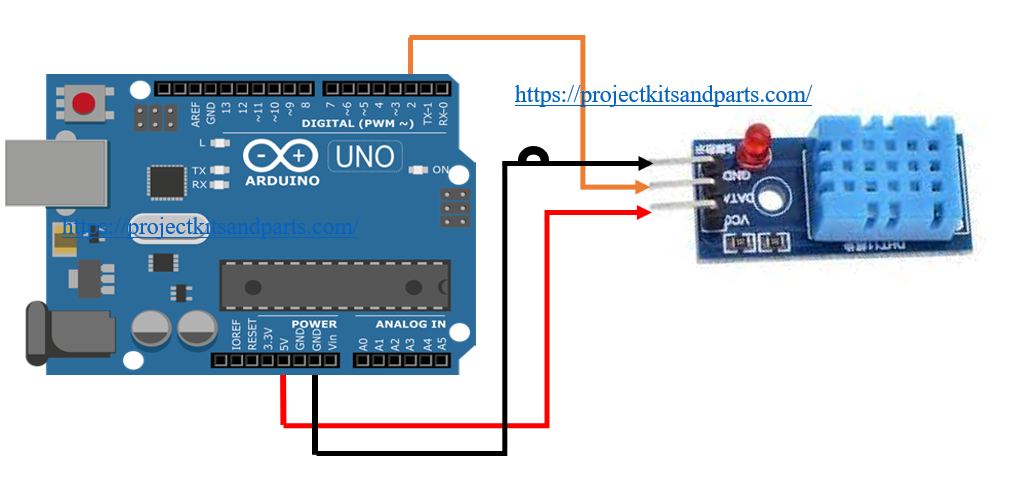
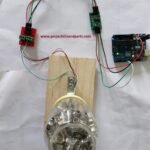
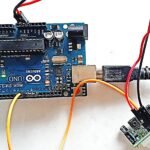
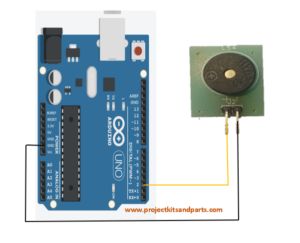
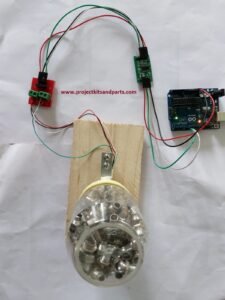
Hardware Connections:
To connect the DHT11 sensor to an Arduino board, follow these steps:
1.VCC -pin DHT11 sensor , 5V- pin of the Arduino board.
2.GND pin of the DHT11 sensor , GND pin of the Arduino board.
3.Sig\data pin DHT11 sensor to Pin 2 digital pin of the Arduino board.
Here, it is connected to pin 10. Make sure to update the `DHT11_PIN`constant in the code if you use a different pin.
Library Installation:
To communicate with the DHT11 sensor, we need to install the DFRobot_DHT11 library. Follow these steps to install the library in the Arduino IDE:
1. Open the Arduino IDE.
2. Go to “Sketch” -> “Include Library” -> “Manage Libraries”.
3. In the Library Manager, search for “DFRobot DHT11”.
4. Look for “DFRobot DHT11” by DFRobot and click on the “Install” button to install the library.
5. Wait for the installation to complete.

Additional Notes:
– Ensure that the DHT11 sensor is properly connected to the Arduino board and that the data pin is connected to the correct digital pin as specified in the code.
– If you encounter any issues, double-check the connections and ensure that the DHT library is correctly installed.
– The DHT11 sensor has a limited accuracy and update rate. It is recommended for basic temperature and humidity monitoring applications.
– Take precautions to protect the DHT11 sensor from moisture and extreme temperatures.
That’s it! You should now be able to read temperature and humidity values from the DHT11 sensor using the provided code and instructions.
Code:
develop by Surabhi.N.Bhivsenkar
#include <DFRobot_DHT11.h>
DFRobot_DHT11 DHT;
#define DHT11_PIN 2
void setup(){
Serial.begin(115200);
}
void loop(){
DHT.read(DHT11_PIN);
Serial.print(“temp:”);
Serial.print(DHT.temperature);
Serial.print(” humi:”);
Serial.println(DHT.humidity);
delay(1000);
}
Code Explanation
1. The `#include` statement includes the DFRobot_DHT11 library, which provides functions for working with the DHT11 sensor.
2. The `DFRobot_DHT11 DHT;` statement creates an instance of the `DFRobot_DHT11` class, named `DHT`, to interface with the DHT11 sensor.
3. The `#define DHT11_PIN 10` statement defines the pin number to which the DHT11 data pin is connected.
4. The `setup()` function initializes the serial communication at a baud rate of 115200 using `Serial.begin(115200)`.
5. The `loop()` function continuously reads the temperature and humidity values from the DHT11 sensor using the `DHT.read()` function.
6. The `DHT.read(DHT11_PIN)` statement retrieves the temperature and humidity values from the DHT11 sensor and stores them in the `DHT.temperature` and `DHT.humidity` variables, respectively.
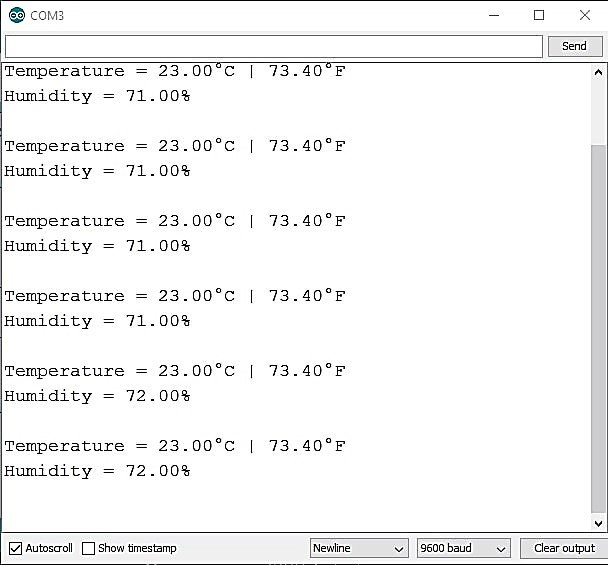
7. The `Serial.print()` and `Serial.println()` statements are used to display the temperature and humidity values on the serial monitor.
8. The `delay(1000)` statement introduces a 1-second delay before the next set of temperature and humidity readings.
Code Output

